HaptiConnect Setup Step by Step GuideUpdated 4 months ago
Below is a step by step written guide to setup HaptiConnect. We also have video format for this guide located here.
HaptiConnect How to Setup
To get started make sure that you have downloaded HaptiConnect.
If you need to download HaptiConnect you can always find the most recent version here.
Overview
HaptiConnect has 2 tabs that have different functionality. These are Game Connect mode and Audio Splitter mode.

Game Connect mode or the game controller is where we convert game data into haptic feedback.

Audio Splitter mode or the wavelength icon uses audio to produce haptic feedback.

Only 1 tab may be in use at a time, and this is whichever tab you are currently looking at.
Configuring Game Connect Mode
1. Inside of HaptiConnect under the Game Controller Icon is the Configure option.

2. Clicking on Configure takes you into the Spatial Configuration Screen.

3. Here you can choose between Mono, Left & right, Front & Rear, or 4 corners configurations.

4. What you choose here depends on how many ButtKickers you have. Ex. if you only have 1 you will choose Mono.
5. The next drop-down shows all your active audio devices from your Windows audio list. Here we want to select the ButtKicker device, targeting it directly.

6. What device you choose here will depend on how it is connected to the PC.
USB - This will display “Speakers (#ButtKicker Plus/Pro)” will say Plus or Pro depending on the model. There may also be a # in front however this is how windows differentiates them if you have multiple devices. This can also happen if you unplug and move USB ports more than once.
3.5mm or Aux – When connecting with 3.5mm there is a bit more to be aware of. This will take the name of whatever it is plugged into. Ex. If you plug into the green line out port on the back of the PC this is usually referred to as “Speakers (Realtek High-Definition Audio)” or “Speakers (Realtek R Audio out)”.
7. Once you select a device a new drop-down menu will appear allowing you to specify an output.

If you are connected to the PC with USB, then you can ignore this drop-down and leave it as output 1. This being regardless of how many you have.
The only time this needs to be changed is when you are using an external sound card that has multiple outputs that you are connected to with 3.5mm. This drop-down would then allow you to choose which output it uses on the sound card. This allows you to have multiple ButtKickers connected to 1 sound card and still be able to spatialize them.
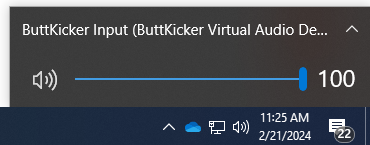
8. Once you have a device selected you can now use the test button to confirm we have the correct device. Make sure the volume slider is at 100% for first time setup. This volume slider ONLY affects the test, it does not impact HaptiConnect volume overall.

If we selected the correct device, you should feel shake at this point.
Configuring Audio Splitter tab
1. Inside HaptiConnect under the Audio Splitter Tab is a menu that follows.

2. The input will always be the ButtKicker input. The outputs will vary depending on what devices you are using. The order does not matter but you want to select the ButtKicker in one drop down and your headset/ listening device in the other.

3. Lastly you need to tell the PC to send audio into our software. To do this all you need to do is set your windows default audio device to the ButtKicker Input (virtual audio device).
You can test that this is working by playing sound, video etc. should both here and feel the sound.